Thermaltake Tsunami: A Complete Visual Overhaul
by Purav Sanghani on September 10, 2004 12:00 PM EST- Posted in
- Cases/Cooling/PSUs
Internal Design
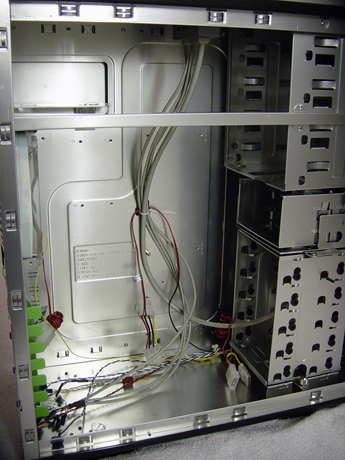
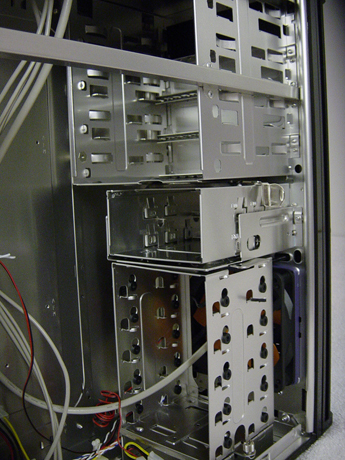
After removing the right side panel, we took a closer look at the Tsunami's aluminum insides. Though the size of the case compares to that of the Cooler Master Centurion and the Enermax Sea Hawk, we were amazed at how much Thermaltake packed into the Tsunami.At the front of the case reside the drive bays. There are four 5-1/4" drive bays at the top. Thermaltake has carried on their drive rail idea to the Tsunami and has included enough to install the four 5-1/4" drives without any hassle. A tool-less design isn't fully implemented, but the most important areas do have devices to make installation much easier.
Below those bays are two 3-1/2" floppy bays and this is where things get interesting. This bay can be removed by pulling back on the spring clip and pulling the carriage back. We did see a flaw in this design in that while components like the motherboard are installed, the carriage cannot be easily removed from its place. These bays do not use drive rails and require screws to secure floppy drives.
A total of 5 HDD's can be mounted in the second removable drive carriage at the bottom of the case. The bays have rubber mounts to absorb any shock that could damage installed hard drives. Thermaltake has included thumbscrews to mount HDD's in place. This carriage is also easily removable, unlike the first one, by removing the thumbscrew which anchors the bay, pressing down on the release and pulling the carriage outwards to the left side of the case.
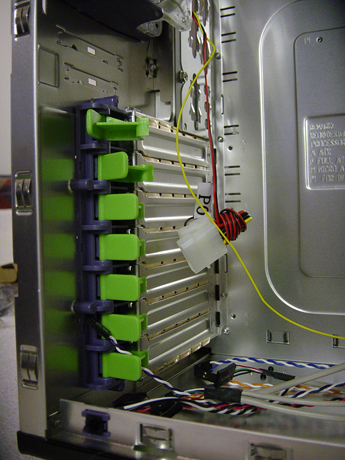
Moving on to the expansion slots, we see a new securing device for expansion cards. Instead of sliding clips, which Thermaltake has used in the past, we noticed that they implemented a new horizontally pivoting clip, which holds cards in place. They are just as effective, if not more, as the sliding clips.
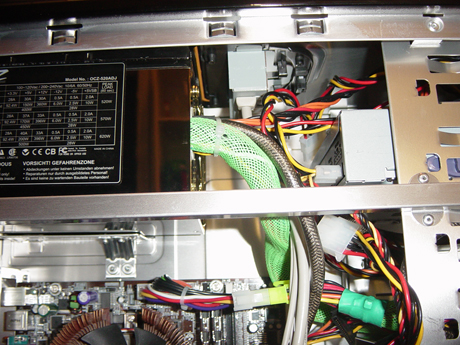
Looking up to where the power supply is mounted, we noticed the lack of space needed to install an oversized unit, or any unit at all, successfully. The bundle of wiring from the auxiliary ports at the top of the case interfered and needed to be removed in order to slide the power supply in place. The cross bar that provides support to the chassis structure, since it is aluminum, was also a block in the road, but we figured there was nothing that the manufacturer could do to get rid of this. We installed our test bed motherboard in the Tsunami first, so our Zalman heatsink fan became a huge problem also. Instead of removing the heatsink, we decided it would be easier to remove the auxiliary pod. Our OCZ PowerStream just barely slid into place.


31 Comments
View All Comments
Aratharn - Friday, September 10, 2004 - link
It looks like a nice case (except for the window which is just personal taste). Were there any worries about the longevity of the paint? Cars get scratched and it would seem a glossy black finish is going to scratch over time.I find the power supply issue intriguing in that I had no such problems in my CoolerMaster WaveMaster case even though I installed a large Enermax power supply unit (465W). I guess the WavemMaster is an old man of a case now, but it would have been nice to see it included in the benchmarks for this comparison.